Introduction to Home Assistant Add-Ons
Home Assistant add-ons are powerful extensions that enhance the functionality of your Home Assistant setup. They can provide additional services, tools, and integrations directly within the Home Assistant environment, making it more robust and versatile. These add-ons can range from simple utilities to complex integrations, allowing users to customize and expand their smart home capabilities.
Home Assistant Google Drive Backup Add-On
Out of all the add-ons I’ve tried and installed, the most important one by far is the Home Assistant Google Drive Backup add-on. This add-on is an essential tool for anyone using Home Assistant, providing a seamless and reliable way to back up your Home Assistant setup to Google Drive. It saved me once when I messed up my Home Assistant and it’s one of those things you’re just happy you had when you need it.
Here’s an in-depth look at what makes this add-on indispensable.
About
The Home Assistant Google Drive Backup add-on offers a complete and easy way to back up Home Assistant to Google Drive. It is designed for users who want a straightforward backup strategy without needing extensive knowledge of Home Assistant or Google Drive. Also, if not obvious by name, it’s for users who have a Google account and Google Drive.
Features Overview
- Scheduled Backups: Creates backups on a configurable schedule.
- Google Drive Integration: Uploads backups to Google Drive, including ones it didn’t create.
- Space Management: Cleans up old backups in Home Assistant and Google Drive to avoid running out of space.
- Customization Options: Offers numerous customization options without requiring YAML file editing.
- Easy Restoration: Allows restoration from a fresh install or quick recovery from disasters by uploading backups directly from Google Drive.
- Integration with Home Assistant: Provides sensors and notifications to alert you when something goes wrong with your backups.
- Simple Installation and Configuration: Extremely user-friendly with comprehensive documentation.
- Privacy-Centric Design: Designed with user privacy in mind.
Installation Instructions
Here are the detailed steps to install the Home Assistant Google Drive Backup add-on:
- Navigate to Add-ons: In your Home Assistant frontend, go to
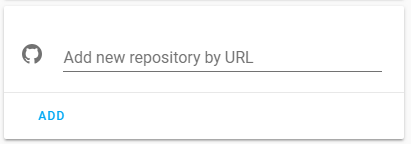
Settings->Add-ons->Add-on Store (Bottom Right). - Add Repository: Click the 3-dots menu at the upper right
...>Repositoriesand add this repository’s URL: https://github.com/sabeechen/hassio-google-drive-backup.
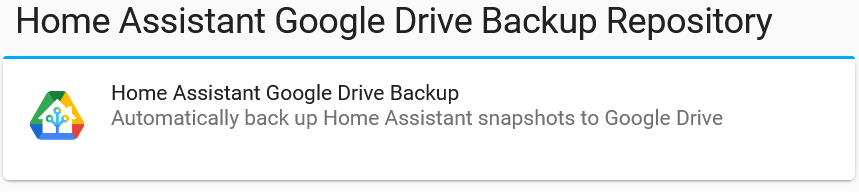
- Reload and Install: Reload the page, scroll to the bottom to find the new repository, and click the new add-on named “Home Assistant Google Drive Backup”.
- Install and Start: Click
Install, wait for the installation to complete, then clickStart. After it starts, click theOpen Web UIbutton. - Authenticate with Google Drive: Follow the prompts in the Web UI to authenticate with Google Drive and set up your backup preferences.
Configuration
The add-on provides a Web-UI for easy configuration. You can also modify settings in YAML or through the supervisor if you prefer, but you really shouldn’t. Here are some key configuration options:
- Backup Frequency: Set how often backups should be created.
- Backup Time: Specify the time of day for backups.
- Generational Backups: Configure to keep daily, weekly, monthly, and yearly backups.
- Notification Integration: Set up notifications for backup status.
Conclusion
The Home Assistant Google Drive Backup add-on is an essential tool for anyone looking to ensure the safety and reliability of their Home Assistant setup. Its ease of use, robust feature set, and seamless integration with Google Drive make it a must-have for every Home Assistant user. By providing automated, scheduled backups and easy restoration options, this add-on offers peace of mind and ensures that your smart home setup remains secure and functional.
For more information and detailed instructions, visit the official GitHub repository.