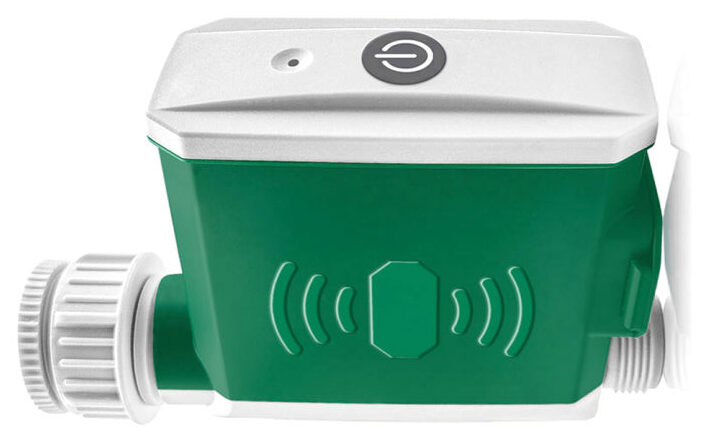
In a previous post, I introduced the Zigbee irrigation valve I’ve been using, including a quirk that allows it to function properly with Zigbee Home Automation (ZHA). Additionally, I discussed a trick to ensure the valve is turned on reliably, as water pressure, Zigbee connection quality, and other factors can sometimes cause it to incorrectly report its status. If you haven’t seen those posts yet, you can check them out here and here.
However, there’s another important aspect of this valve that I haven’t yet discussed: the internal shutdown timer. This timer is likely intended as a safety measure, turning off the valve after a predefined period. My valve came with a default shutdown time of 1 minute, while newer models often have a 10-minute timer. While I don’t recommend completely removing this safety feature, it’s essential to know how to adjust the timer to suit your needs. Unfortunately, this timer isn’t exposed as a native entity in ZHA, so you’ll need to do a bit of extra work to modify it.
Manual Method: Adjusting the Timer via “Manage Zigbee Device”
- Accessing the Valve Settings:
- Navigate to your irrigation device in Home Assistant.
- Click on the hamburger icon next to the “RECONFIGURE” link and select “Manage Zigbee Device.”
- Adjusting the Timer:
- Under “Clusters,” choose
TuyaValveFamilyCluster. - Under “Attributes,” select
irrigation_time. - Press “Read Attribute,” and you’ll see the predefined shutdown time in minutes.
- You can now change this time (in minutes) and click “Write Attribute” to save the new maximum time for the valve.
- Under “Clusters,” choose


Automatic Method: Using a Home Assistant Script
If you prefer an automated approach, you can use the following script in Home Assistant. First, you’ll need to confirm the endpoint_id (mine is 1), cluster_id (mine is 0xef00) and attribute (mine is 0xef01) from the “Manage Zigbee Device” screen, as explained above. These values should match your device, but if they don’t, you can adjust them accordingly in the script.
Go to Settings -> Automations & Scenes -> Scripts -> Add Script -> Create New Script -> Menu Icon -> Edit in YAML. Now copy and paste the following script.
alias: Irrigation - Change Max Time
fields:
  target:
    name: target
    description: The target switch to control
    selector:
      entity:
        multiple: false
        filter:
          integration: zha
          domain: switch
  maxtime:
    name: maxtime
    description: The maximal time the valve will stay open
    selector:
      number:
        min: 0
        max: 120
sequence:
  - data:
      cluster_type: in
      ieee: >-
        {{ device_attr(target, 'identifiers') | selectattr(0,'eq','zha') |
        map(attribute=1) | first }}
      endpoint_id: 1
      cluster_id: "{{'0xef00'| int(base=16)}}"
      attribute: "{{'0xef01'| int(base=16)}}"
      value: "{{maxtime | int}}"
    action: zha.set_zigbee_cluster_attribute
- Important: Check the
endpoint_id,cluster_id, andattributevalues in the script against what you observed in the “Manage Zigbee Device” screen. If they differ, adjust the script accordingly.
Once you’ve configured this script, you can create an automation that calls it. This will allow you to easily select the irrigation switch entity, set the desired time, and automatically update the valve’s shutdown timer. For added convenience, you can even create a card on your Home Assistant dashboard to change an input_number helper that updates this value and calls the automation.

Conclusion
This Zigbee irrigation valve is a solid choice for smart home irrigation, though it does have a few quirks that require some tweaking. Once you’ve got these under control, it performs reliably and effectively.
Additional Tip: If you’re still experiencing issues with the valve, consider using non-rechargeable AA batteries. Rechargeable batteries tend to drain over time and suffer from a voltage drop that can affect devices like this one.


Hi!
I don’t have the TS0049 device Haozee branded and I don’t have the “TuyaValveFamilyCluster”.
I can turn on and off the valve, but I can’t modify the shutdown timer. Do you have any tips how to troubleshoot it?
I almost gave up on these types of valves, even when they did work, they had so many issues, the biggest one being that you’d turn it on, you’d see that it’s on in Home Assistant, yet it wasn’t actually on. So you could never be 100% sure that it was working (or worse, that it stopped working). I ended up with a completely different solution that I found to be 100% reliable. It’s not the nicest solution, but it works. I had an old Tuya Zigbee Hub at home. I connected the Tuya Zigbee Hub to the valves. In the SmartLife app these valves work great and are 100% reliable. I was able to obviously change the shutdown time from the app. Then I created “scenes” in SmartLife for turning on and off the valves, those scenes appear in Home Assistant. So I can now turn on and off whenever I want through Home Assistant, the only inconvenience is the extra Tuya Hub. But it does work…