
Introduction
After installing Home Assistant and familiarizing yourself with the essential terms, it’s time to move on to something more exciting: creating your very first custom dashboard. The default home dashboard that Home Assistant generates can be cluttered and overwhelming, so we’ll guide you through the steps to create a clean, personalized dashboard that suits your needs.
Starting Fresh: Creating a New Dashboard
Home Assistant starts with a default dashboard, but we’ll ignore that and start from scratch. Here’s how:
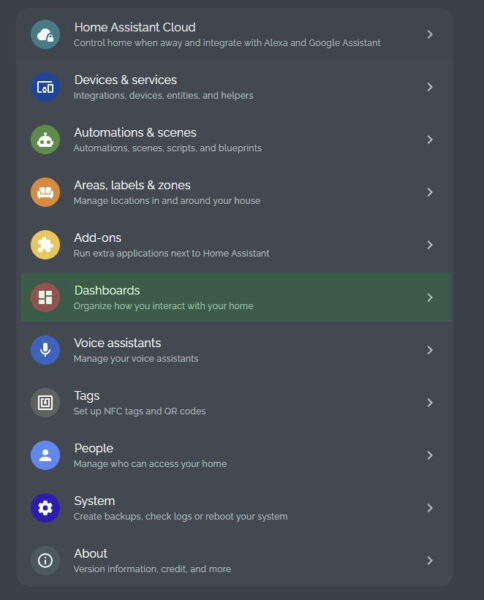
- Navigate to Settings: Go to Settings -> Dashboards.
- Create a New Dashboard: Click on the Add Dashboard button and select “New dashboard from scratch.”
- Name Your Dashboard: Give your dashboard a name and choose an icon if you like. You can leave the URL field blank as it will update automatically. Leave the other options unchanged and click Create.
Your new dashboard will now appear in the left-hand menu, and it will be an empty canvas ready for you to customize.
Selecting a Device to Control
Before we add our first button to the dashboard, let’s take a moment to survey the available devices and choose one to control as a test. This will ensure we have the necessary Entity ID ready when we start building our dashboard.
- View Available Devices: Go to Settings -> Devices & Services to see all available devices and entities. You might already have some devices discovered automatically. For instance, the Tuya integration might appear and ask for further authentication, which you can follow on-screen.
- Add a New Integration: If you have devices from a specific brand that aren’t listed, click Add Integration and search for the brand to add it.
- Find the Entity ID: Click on the integration, then on the XX devices link to view all devices under that integration. Click on the device you want to control, and then note down the Entity ID of the relevant entity, like a switch.


Customizing Your Dashboard
Now it’s time to add your first button:
- Edit Your Dashboard: Click on your new dashboard’s name in the left-hand menu, then click on the pencil icon in the top right corner to enter edit mode.
- Add a Card: Click on + Add Card in the bottom right corner. This will show you all available card options.
- Select a Button: For simplicity, choose the Button card.
- Configure the Button: Under Entity, enter the Entity ID you noted earlier. You can give the button a name and choose an icon. You’ll see a preview of the button on the right.
- Save Your Changes: Click Save, then click DONE at the top of the screen.
And there you have it—your first custom dashboard with a button that controls one of your devices!
My Own Dashboard

I’ve divided my own dashboard into three conceptual sections: on the left is the ‘Security’ column, where I monitor security cameras, door sensors, and the battery status of my cameras (I see my back camera’s battery is at 2%, time to recharge!). The middle column is dedicated to all indoor-related switches and devices, and on the right, I’ve placed everything outdoors, including a small hourly weather forecast in the bottom right corner with animated icons. As you explore the different cards, you’ll start to find what works best for your home, devices, and personal style. In a future post, I’ll show you how to discover and install additional cards created by the fantastic Home Assistant community, opening up even more customization options. The possibilities are endless, limited only by your smart home setup and your creativity.
Dashboard Device
While you can totally access your dashboard from a mobile phone or computer, one of the best things to do is to set up a tablet (Any cheap Android tablet will do) and mount it on a wall. This allows you to quickly access features and see sensor updates right when you’re entering or leaving your house. In a separate blog post, I have recommendations on where to order special tablet frames that securely mount the tablet on a wall in a very aesthetic manner. These frames are designed to exactly match the tablet and offer a concealed way to keep the tablet charged, so you don’t have unsightly charger cables running down your wall. Before choosing a tablet, I suggest checking to make sure that a wall mount is available for your selected model.
Displaying The Dashboard
Although you can access your dashboard via a web browser, there are other methods worth considering. Home Assistant has companion apps for both Android and iOS. These apps not only display your dashboard but also turn your phone into a device in Home Assistant, allowing you to access sensors such as battery state, location, connected Wi-Fi network, and more. Setting up the companion app on your phone is highly recommended, as these extra sensors come in handy for automations. For a wall-mounted tablet, you can use either a browser or the companion app, but I recommend using an Android app called Fully Kiosk Browser. This app allows you to “lock” the display so that users in your home can’t accidentally or intentionally exit the dashboard or access settings that they shouldn’t. It also adds useful entities to Home Assistant, such as the ability to remotely control screen brightness, turn the display on when motion is detected, and much more. I cover the installation and use of Fully Kiosk Browser in a separate post.
Security Considerations
At this stage, your dashboard is only accessible within your local network and is protected by the username and password you set up during the initial configuration. There are options to create additional users and assign different permission levels, which I’ll cover in a future post. If your concern is not about other users but rather accessing your dashboard and Home Assistant setup from outside your home network, there are several ways to achieve this as well. These methods are detailed in a separate blog post: Connecting to Your Home Assistant Remotely: A Guide.
Conclusion
Take some time to explore and experiment with different dashboard elements. As you become more comfortable, you’ll find endless ways to customize your setup. In a future post, I’ll share some design ideas to inspire you further.
If you’ve explored the options and played around with the dashboard you can advance to the next level by clicking the button below.


Found that when I’m just starting out it’s a little hard to make a dashboard. Don’t have enough device and-or automations for that. But I’m saving this for later (thanks for this feature here) and will return to it when my devices are delivered.
Pingback: Voice-Controlled Automation: How to Use Alexa with Home Assistant - Dr. Smart Home
Cool, easy and good recommendations.
Thanks!